Love to Bake? Here’s How to Organize Your Baking Supplies
If you bake regularly, you know how quickly baking supplies can take over a pantry.
If you’re like me, you’ve probably found yourself digging through the pantry, moving half-used bags of flour, sugar, chocolate chips, sprinkles and other baking ingredients, looking for athe one thing you know is in there somewhere. Add extracts, decorating supplies and specialty ingredients to the mix, and baking supplies can quickly take over more space than you realize.
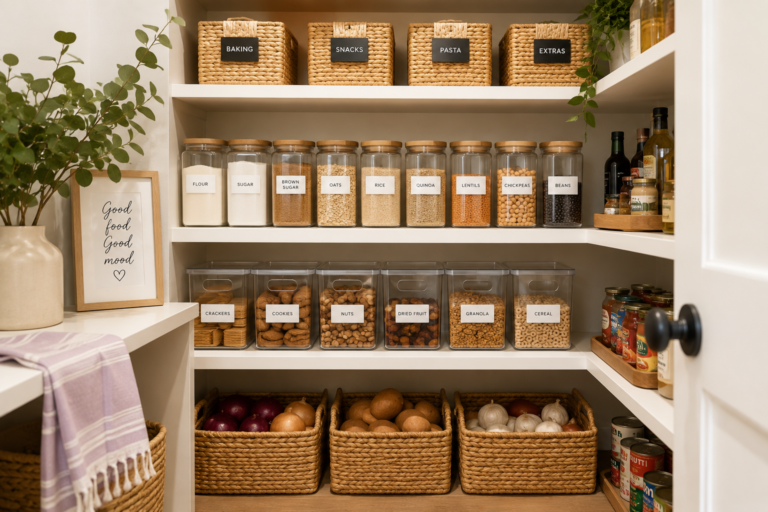
The solution doesn’t have to be an elaborate Pinterest-perfect pantry. A good baking organization system simply makes the ingredients you use most easy to see, easy to identify and easy to grab.
That’s how I organize mine.
1. Keep Your Baking Supplies Together
One of the simplest changes you can make is to designate one section of your pantry for baking. I have a deep pantry, so rather than spreading baking ingredients throughout it, I use a relatively small section and take advantage of the ability to stack containers.
Keeping baking ingredients together means that when I’m ready to bake, I’m not searching different shelves for flour, baking powder, chocolate chips or sprinkles. Think about what you regularly use and create a baking area around your habits.
For me, that includes things such as:
- Flour and specialty flours
- Sugar, brown sugar and icing sugar
- Baking soda and baking powder
- Cornstarch
- Oatmeal
- Chocolate chips
- Sprinkles
- Extracts
- Other frequently used baking add-ins
The goal isn’t to create a perfect display. It’s to make baking easier.
2. Choose Container Sizes Based on What You Actually Use
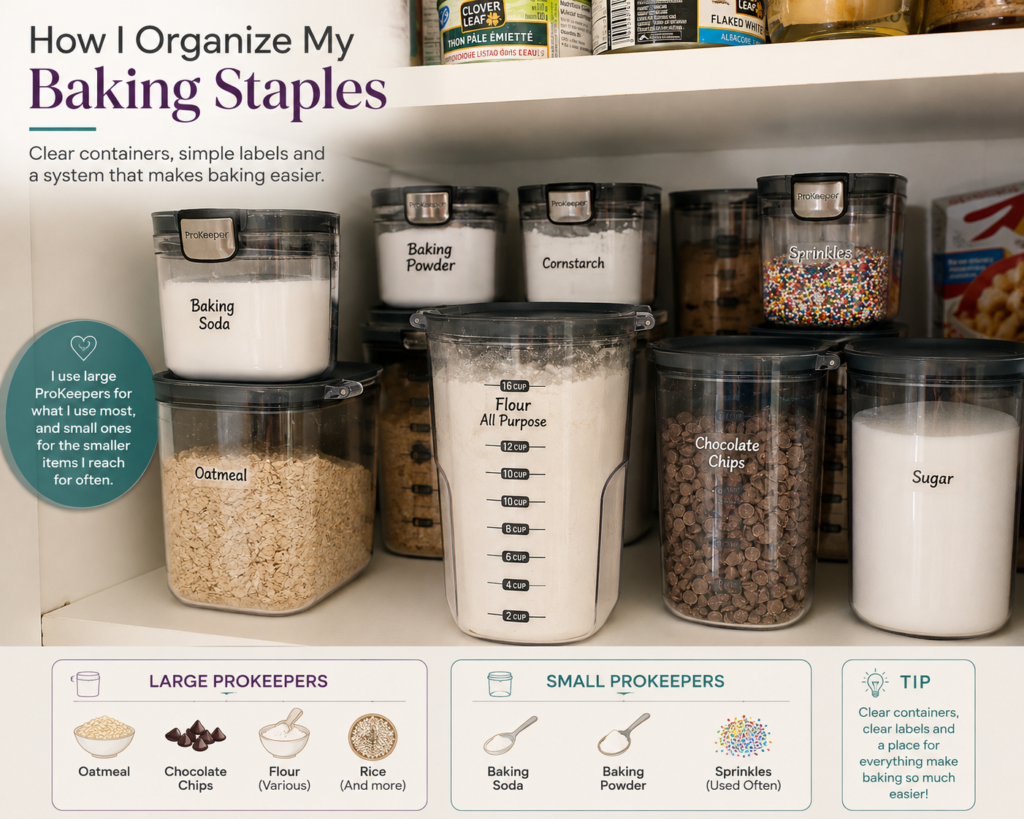
Not every ingredient needs the same size container. I use large Progressive ProKeeper containers for ingredients I keep in greater quantities, including oatmeal, chocolate chips and various flours. I even use one for rice.
Chocolate chips are a good example. I buy them at Costco and use them frequently, so a large container makes much more sense for me than a small decorative canister. For ingredients I use regularly but keep in smaller quantities, I use small ProKeepers. Baking soda and baking powder each have their own smaller container, and I also keep frequently used sprinkles in one.
This is one of the most important things I’ve learned about pantry organization:
Choose the container for the ingredient, not the ingredient for the container.
You don’t need an entire pantry filled with identical containers. Different sizes can still look organized while being much more functional.
Start With What You Need
You also don’t have to buy every container at once. I started with the Progressive ProKeeper Baker’s Storage Set, which included nine pieces, and then added more containers once I had used the system for a while and knew what else I actually needed.
Starting smaller gives you a chance to see what works before investing in more. Add to your system when you identify a need rather than trying to predict everything at the beginning.
3. Keep a Scoop Right in the Container
This is one of those small things that makes baking easier. I keep a ½-cup scoop in many of the containers I use regularly.
Having a scoop right in the container means I don’t have to dig out measuring cups every time I need flour, sugar, oatmeal or another staple. Some of my containers came with scoops. For the containers that didn’t, I purchased the OXO Good Grips POP Container Accessories 3-Piece Scoop Set.
And when I’m using my kitchen scale, the scoop is just as useful for transferring ingredients directly from the container into the mixing bowl.
4. Label Baking Ingredients Clearly
Labels are particularly important with baking ingredients. Think about how many of them look almost identical once they’re out of their original packaging: flour, sugar, icing sugar, cornstarch, baking soda and baking powder.
They’re all white powders.
Without labels, it can be surprisingly easy to grab the wrong one, especially when you’re moving quickly through a recipe. I label my containers clearly so there’s no guessing.
Labels also make it easier for everyone else in the house to find ingredients and, just as importantly, put them back where they belong. And if you use multiple kinds of flour, label those individually too.
The purpose of the label is simple: knowing exactly what you’re reaching for.
I use 612 Script Pantry Food Labels on many of my pantry containers.
5. Use Clear Containers So You Can See What You’re Running Out Of
Clear containers do more than make a pantry look organized. They let you see what you have. When I can see that the oatmeal is getting low or that we’re running out of chocolate chips, I know to add them to the shopping list.
That helps prevent buying something you already have or discovering halfway through a recipe that you don’t have enough of something you thought you had. For ingredients I use frequently, being able to see the quantity at a glance is incredibly useful.
6. Make Your Pantry Space Work for You
My pantry is deep, which gives me lots of storage, but deep shelves create a different problem: things can disappear in the back. I use both the depth and the vertical space.
Because many of my containers stack, I can keep my baking supplies in a relatively compact section. Smaller containers can be stacked with compatible larger containers where it makes sense.
The trick isn’t necessarily to fill every inch of space. It’s to arrange things so you can still easily get to what you need. Stack where you have the space, keep frequently used items accessible, and avoid creating so many layers that you have to empty the shelf to find something.
Whether your pantry is deep, shallow, tall or compact, the goal is the same: make the space you have work for you.
7. Give Your Add-Ins a Home Too
Baking organization isn’t just about flour and sugar. The smaller extras are often what create the clutter.
Chocolate chips, oatmeal, sprinkles, nuts, dried fruit, coconut and other baking add-ins can easily accumulate in half-open bags. I prefer giving the things I use regularly a dedicated container.
Oatmeal and chocolate chips get larger containers because I use and buy more of them. Sprinkles I reach for regularly go into a smaller container.
Again, the system should reflect how you bake, not a rule about how a pantry is supposed to look.
8. Don’t Forget About the Extra Bag
This is something beautiful pantry photos don’t always show: what happens when the entire Costco-sized bag doesn’t fit in your container?
If you have the storage space, partially used backup packages can go together in a larger backstock bin. When your everyday container gets low, simply refill it from the backstock.
Another option is to use a larger airtight container for your bulk supply and refill the smaller pantry container from it. This works particularly well with ingredients such as flour that you may buy in larger quantities.
Your everyday pantry container doesn’t have to hold the biggest package you ever purchase. It only needs to hold a practical amount for everyday use.
9. Give Certain Ingredients Special Treatment
Not every baking ingredient should be stored the same way. I keep brown sugar in a Progressive Brown Sugar ProKeeper, which includes a ceramic disc to help keep it soft.
Yeast is another example. I keep mine in a ProKeeper in the refrigerator rather than in the pantry.
I go through many of my baking ingredients quickly, so I don’t normally mark expiry dates on my containers. If you use yours more slowly, adding or tracking best-before dates when you transfer ingredients is a good idea.
The system should always reflect how often you actually use what you store.
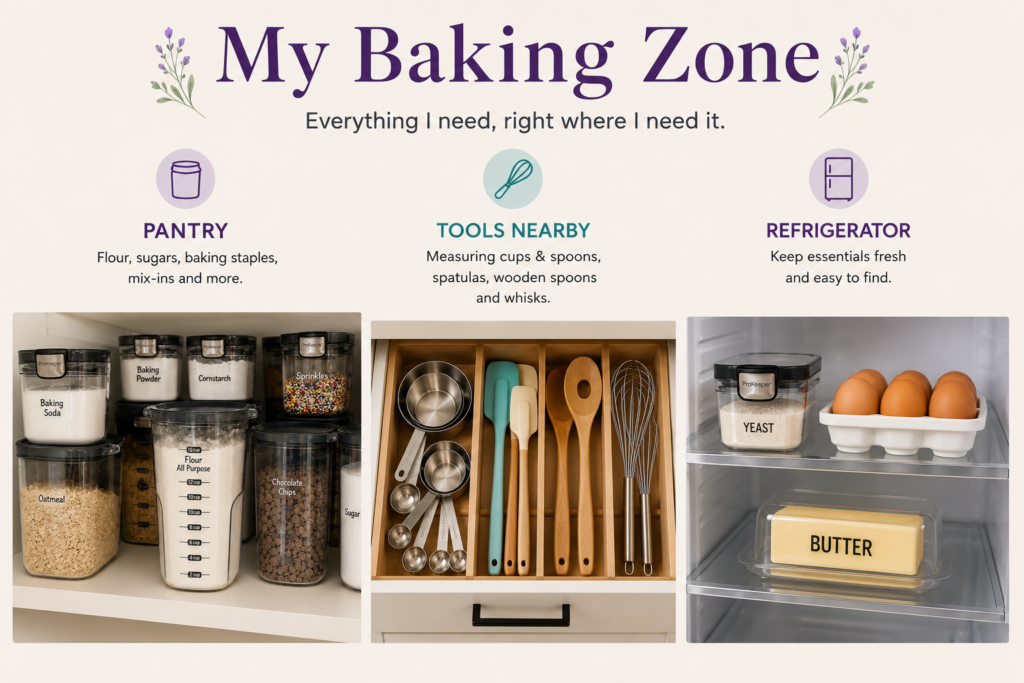
10. Think Beyond the Pantry: Create a Baking Zone
My baking supplies may be organized together in the pantry, but I think of my baking zone as something bigger than one shelf. It’s really the whole system around where I bake.
My measuring spoons are in the drawer directly in front of where I bake. My dry and liquid measuring cups are in the cupboard above me. Extracts and other baking ingredients are together in the pantry, while ingredients that need refrigeration stay in the fridge.
Everything is stored close to where it makes sense to use it. Your baking zone doesn’t have to look like mine. Think about what you reach for every time you bake and whether you’re storing it somewhere that makes the process easier.
11. A Kitchen Scale Can Make Measuring Easier
I’m a huge fan of using a kitchen scale when I bake. When a recipe provides ingredient weights, I can put my mixing bowl on the scale, zero it, and add ingredients directly to the bowl.
And because I already have a scoop in the container, I can simply use it to transfer the ingredient into the bowl. No extra measuring cup required.
12. Organize for the Way You Actually Bake
This is really the principle behind the entire system. I cook and bake often, so I want the ingredients and tools I use regularly to be accessible. Someone who bakes twice a year doesn’t need the same setup.
Before buying organizers, look at what you already have and ask:
- What do I use most?
- What am I always looking for?
- What do I buy in large quantities?
- What tends to get lost or forgotten?
- What would make baking easier?
Then build your system around those answers.
13. Pull Out What You Need, Then Reset as You Go
Organization also changes the way I actually move through a recipe. Before I start baking, I pull out all the ingredients I’m going to need. That includes extracts and other supplies from the pantry as well as anything I need from the refrigerator.
Once everything is out, I start the recipe. Then, as I measure and use each ingredient, I put it away. If there are waiting times during the recipe, I’ll often clean the dishes I’ve already used too.
By the time I’m finished, most of the ingredients are already back where they belong and much of the cleanup is done. Then I just finish the remaining dishes and wait for the yummy creation.
It’s a simple habit, but it’s another example of why I love systems that work: a little organization at the beginning and along the way makes the whole process easier.
A Baking System That Works
You don’t need a huge pantry or rows of perfectly matching containers to create an organized baking space. Start with one section.
Group your baking ingredients together. Choose container sizes based on how much you actually buy. Keep scoops where you use them. Label ingredients that are difficult to tell apart. Use vertical space when it helps. Give frequently used add-ins a home. Keep bulk backstock somewhere else when necessary.
Then look beyond the pantry and think about the entire space where you bake. Most importantly, create a system you can actually maintain.
Because the best organized pantry isn’t the one that looks perfect the day you finish it.
It’s the one that still works six months later.
Organize today. Easier tomorrow. ♡.
Products I Use
These are products I use in my own baking and pantry organization system:
Progressive ProKeeper Baker’s Storage Set
I started with the nine-piece baker’s set and added individual containers as I figured out what else I needed.
Progressive ProKeeper containers with scoops
I added this set when I found how useful they were, these are great for rice and oatmeal.
Progressive Brown Sugar ProKeeper
The included ceramic disc helps keep brown sugar soft. This is also included in the ProKeeper Baker’s Storage Set.
OXO Good Grips POP Container Accessories 3-Piece Scoop Set
I use these in containers that didn’t already include a scoop.
612 Script Pantry Food Labels
I use these to clearly identify pantry ingredients that can otherwise look very similar.
Keep Organizing Your Pantry
Want to tackle the rest of your pantry? See how I organize my deep pantry and the simple systems I use to make everything easier to find in How to Organize a Deep Pantry (Without Losing Things in the Back). You can also grab the free Printable Pantry Reset Checklist to work through your own pantry step by step.